4LB 50/50 INJECTABLE HORSE MANURE AND RYE GRAIN MUSHROOM GROWING KIT
4LB 50/50 INJECTABLE HORSE MANURE AND RYE GRAIN MUSHROOM GROWING KIT
Couldn't load pickup availability
Please allow 2-5 working days for dispatch as all items are made fresh per order to ensure they are sterile.
Spores are not included.
Never Heat the needle, our needles come sterile. Only wipe the injection port only.
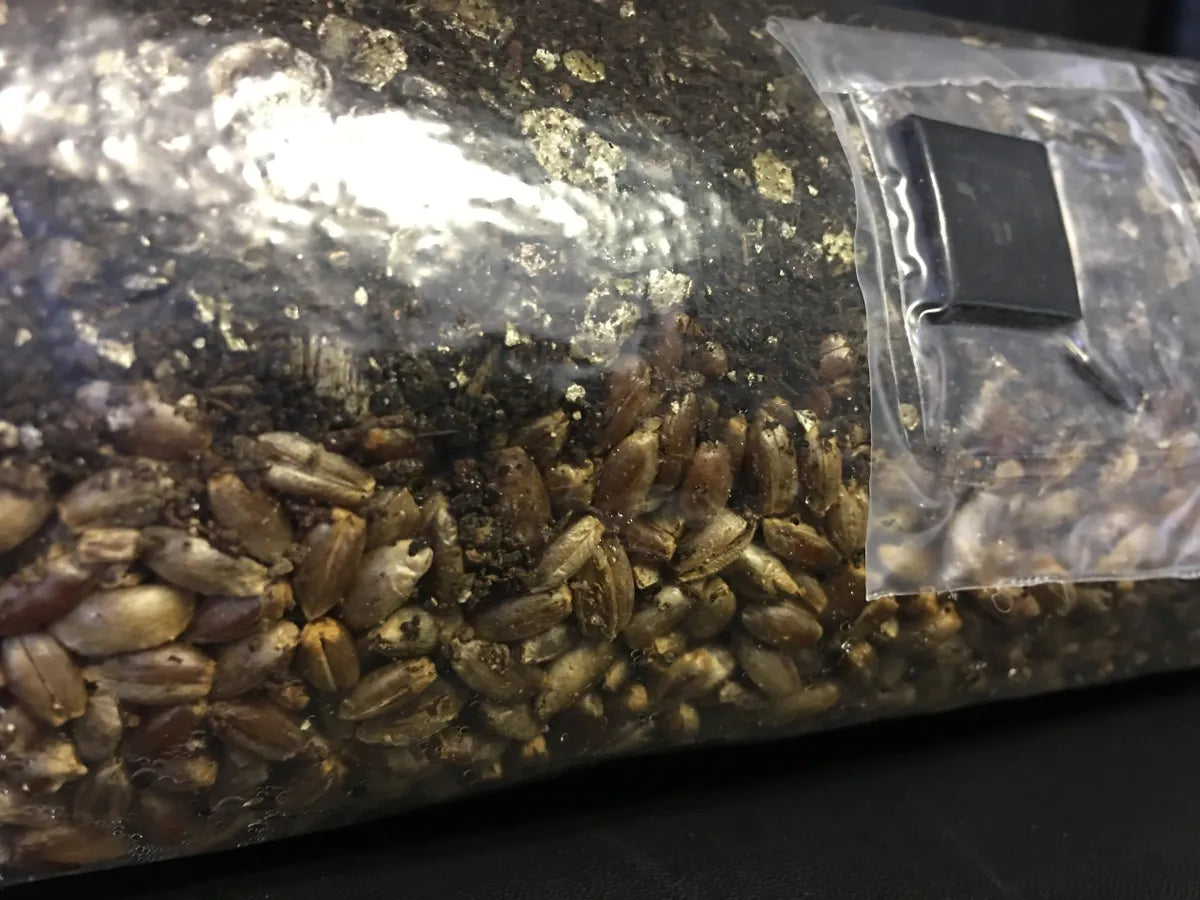
The Kit is designed to be the next step up in mycology study after practising with the Brown rice flour bags, Pf Tek and Inject and Forget Bags. Just like our Hpoo and brown rice flower 50/50 mushroom growing kit but now incorporating the benefits of directly injectable Rye grain substrate in the base of the bag (2lbs) and Hpoo based substrate sitting up top (2lbs), makes for easy and fast colonisation with the added benefit of all the goodness of hpoo to really bring out the flavour/strength of your mushrooms. All mixed together in the safety of one bag meaning that no nasties will enter your substrate mix while you are combining the two substrates.
Mushrooms Grown on Horse Manure based Substrate are larger, stronger and have fuller flavours and the addition of Rye grain really pushes the envelope. After injection with spore solution. The rye grain will colonise as normal and the mycelium will then grow up into the Horse Manure. To speed up the process, I like to wait until the rye grain has a golf ball sized lump of white mycelium before mixing it all up. I break up the colonised rye grains and mix this around with the Hpoo. When completely mixed up I can then pour this mix straight into my Mono Tub for a bulk grow or I can leave the mix in the bag and find the bag is fully colonised in less than 7days.
When the cake is fully colonised, birth the cake from the bag and fruit this massive 4lbs cake in a Fruiting chamber Or fruit the cake in the INCLUDED Grow bag if you do not want to go through the hassle of building a fruiting chamber. Instruction for bag fruiting can be found below.
The all in one kit Contains:
1. 50/50 Substrate bag containing 4lbs of Substrate.
2. XLS Fruiting bag
3. Sterilised Vermiculite for rolling the cake in
4. Alcohol swab
The Substrate mix is.
Rye grain
Coco Coir
Vermiculite
Horse Manure
Growth supplements
Gypsum
The mix is perfectly hydrated to take you from injection all the way to your first flush. The mix comes supplied in 0.5 Micron Filtered incubation bags with Injection Port. To Use (fruiting from the bag):
- 10ml of spore solution is to be injected into the 50/50 bag via the Black Injection Port at the bottom of the bag. Clean the injection port with the included alcohol swab
- Place the 50/50 bag some where warm 26-27c. This will allow the spores inside to germinate and the resulting mycelium will start to colonise up the substrate. Colonisation for this method is best done in the dark. We will use the introduction of light in latter steps to induce fruiting of the colonise cake.
- Keep the bag in the dark until it is fully colonise and ready to fruit
- When the mycelium has grown to the size of a golf ball, you can now break up the mycelium and try your best to mix all the mycelium through-out the substrate. This will allow the mycelium to fully colonise the substrate at a very fast rate.
- When the substrate is 95% colonised (mostly white). You will need to cut the grow bag away and roll the cake in the provided vermiculite. Now place the vermiculite covered cake into the new fruiting bag and give the inside of the bag a heavy spray down with fine mist and close the bag.
- To fruit the vermiculite covered cake. Simply move the all in one bag into the light and keep at 26-27c
- Dont not open the bag for the first 4days. The closed bag allows for moisture to build up inside the bag and the 4 day period allows the Mycelium to grow up through the vermiculite coating. These two actions are setting you up for a heavy harvest.
- Day 5 onwards you want to be opening the bags 3 times a day and fanning fresh air into the bag for 40 seconds each time. Sealing the bag back up after fanning. On the first opening of the bag, please spray a little fine mist of fresh tap water onto the insides of the bag. Doing this once in the morning will make a nice moist environment and the 3 fanning sessions a day will provide enough evaporation of moisture to promote a thick and heavy pinset.
- Continue until pins show. At this point you can stop with the fanning. Misting once in the morning and just leave one corner of the bag open 1 inch all the time to allow for air flow.
- The Mushrooms will grow happily in the bag until they are mature and ready to harvest.
- Harvest the mushroom before they start to drop black/puple spores either by reaching into the bag or by sliding the bag down so mushrooms can be removed at will.
- To get more mushrooms to grow from the substrate. Simply harvest all the mushrooms (leave tiny pins for next time round), leave the cake in the XLS bag and pour water into the bag from the cold water tap. Add enough water to make the cake float in 1inch of water. Seal the bag and leave for 12hrs. After the 12hr soak. Drain the water from the cake/bag for 15mins.
- Place back in fruiting position, close the bag up, lights on and temps 26-27, fans bag tops until pins show and then leave a 1inch air gap for daily air flow until mushrooms are ready to harvest.
Share